Pam’s Trifle

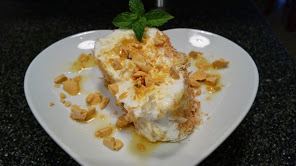
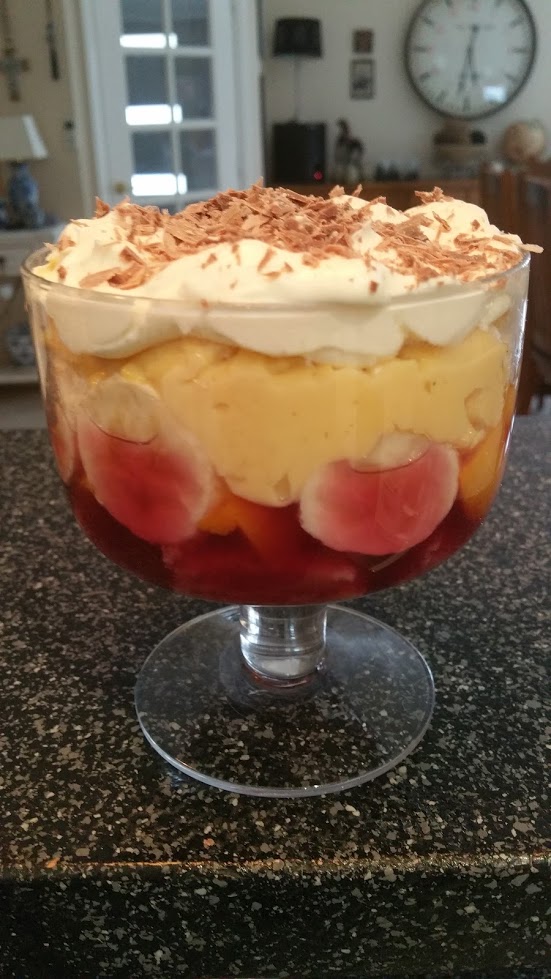
Trifle is a luscious British dessert that has stood the test of time. It usually consists of a cake layer, fruit, jelly, custard and cream. There are many variations of those key ingredients and a few methods of preparation. This is my mother’s recipe. She learned it from her mother and no doubt it has been passed down over many generations. Every Christmas and special occasion my mum would make a trifle and we would polish it off. It is an easy dessert to make but you do need to give yourself some time as the jelly needs to set and it definitely tastes better the next day. You can go the extra mile and make the sponge cake and custard from scratch, but it’s still delicious using store bought ingredients. My mum, my beautiful English rose passed away a few years ago. I am so grateful she taught me to cook and she lives on through her recipes.

Please like my Facebook page for great recipes, home and craft ideas     https://www.facebook.com/homeinthealice


trifle

Ingredients

  • 2 x 85 gram packets of jelly (Port Wine or Raspberry)
  • 500 grams of fruit (your choice i.e. tinned fruit salad – drained, tinned peaches- drained, strawberries, raspberries, bananas)
  • 500 mls thick vanilla custard (can be home made or shop bought)
  • 250 gram packet jam rollettes (or equivalent weight of madeira cake, swiss roll or sponge)
  • 1/3 cup Apera (sherry) – optional
  • 300 mls thickened cream
  • 2 teaspoons icing sugar mixture
  • 1 teaspoon vanilla essence
  • 1 Cadbury Flake bar

Preparation

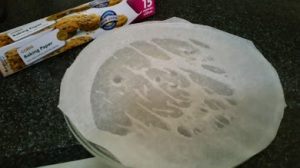
  • Slice the cake and place it in the bottom and half way up the side of a large serving bowl until you have used all the cake up.
  • Layer the fruit over the cake. Sprinkle with Apera (sherry) if you are adding alcohol to the dish.
  • Place jelly crystals in a heatproof bowl. Add 500 mls of boiling water. Whisk until crystals have dissolved. Stir in 300ml cold water. Pour the jelly over the cake and fruit making sure the jelly coats the cake. Cover. Refrigerate for 4 hours or until firm.
  • Spoon custard over the jelly.
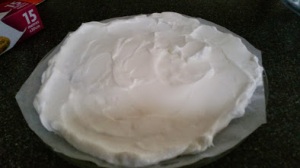
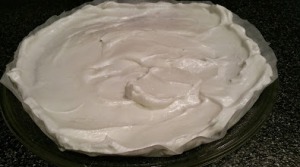
  • Using an electric mixer, beat cream, sugar and vanilla essence until soft peaks form. Top trifle with cream mixture. Cover. Refrigerate overnight.
  • Top with crushed Flake bar.


Tips…

  • If you are using tinned fruit in your trifle reserve the juice and replace it for the equivalent amount of cold water when making the jelly.
  • Do not use fresh pineapple, kiwi fruit or paw paw as the jelly will not set properly.
  • You can make trifle in individual glass bowls or glasses.
  • If you use store bought custard make sure it is a very thick one.


Persian Lamb Stew

This stew is simple but packed with flavour. You need very few ingredients to create such a great dish.  I cook this meal often and use the stove or pressure cooker… both ways are equally delicious. It works well with any cut of lamb as long as you can cut it into chunks. Today I used lamb forequarter chops and made sure to cut excess fat from around the chops.

lamb

Ingredients

  • 1 tablespoon  turmeric
  • 2 teaspoons black pepper
  • 1 teaspoon crushed red chilli flakes
  • 3 tablespoons oil
  • 2 medium onions, finely diced
  • 1.5 kilos lamb meat cut into chunks
  • 3 tablespoons tomato paste
  • 1/4 cup fresh parsley or coriander, chopped
  • 1 litre beef stock
  • 1 handful of baby spinach leaves

Preparation

  • In a small dish, mix together turmeric, black pepper, salt, and chilli.
  • In a large pot, heat oil over a medium heat. Sauté until onion softens and starts to turn golden brown.
  • Add the meat to the pot and sprinkle over the seasonings.
  • Sauté until the meat has browned on all sides.
  • Add the stock and bring to a slow boil, then reduce heat to low. Simmer for two hours.
  • Skim the fat from the surface every 30 minutes.*
  • After 2 hours, add tomato paste to the pot and stir thoroughly.
  • Simmer for another 20 minutes uncovered until the meat is tender and the sauce has reduced.
  • Add the spinach leaves and stir until they have wilted.
  • Garnish the stew with fresh parsley or coriander.
  • Serve with steamed basmati rice and sour cream/Greek yoghurt (optional).

* Placing paper towel on the top of the stew is an easy way to skim the fat. Be careful as the liquid is extremely hot.

Banana Caramel Moneybags

This is a super easy little dessert I dreamed up today. I love bananas and caramel and its a quick take on banana fritters without the fuss.  I always have a squeeze bottle of home-made caramel sauce in the fridge for desserts. The sauce is a breeze to make in the microwave and keeps well in the fridge.You can buy it ready made and while its good, it is no substitute for the real deal.  The wonton wrappers can be found in the cold section of major supermarkets. Whip up a batch, you wont be disappointed. Each banana will make about 8 moneybags.

w 4

Ingredients 

  • I pack wonton wrappers
  • 3 bananas (cut into 8 slices per banana)
  • Caramel sauce (recipe below)
  • 2 cups of oil for frying

w                  w 5 

w 1

w 6

Preparation

  • Heat the oil in a medium saucepan until it reaches 400 degrees F.
  • Smear a small amount of caramel sauce over each wonton wrapper.
  • Place a banana piece in the middle of the wonton wrapper and scrunch the wrapper up.
  • Gently place in the oil, cooking about 3 at a time.
  • Remove from oil when the wrapper is brown.
  • Drain on kitchen towel and keep cooking until all the wrappers are cooked.
  • Serve warm with extra caramel sauce and ice cream.

Caramel sauce

  • 60 grams salted butter
  • 1 cup light brown sugar, lightly packed
  • ½ cup cream
  • ½ teaspoon vanilla extract

Place all ingredients in a microwave proof jug and microwave on high for 3 minutes. Stir and cook for another minute.

w 3

Cumquat Cordial

What to do with a bag full of cumquats? I have been making jam all week so the idea of making marmalade was not appealing. The weather is so hot at the moment, making it an ideal time to make cordial. This recipe is easy and oh so delicious. The most tedious part is squeezing the cumquats, but it doesn’t take long if they are nice and ripe. Tartaric acid and citric acid are readily available in the baking aisle at the supermarket. Makes a refreshing Cumquat Joquito (my non alcoholic version of a mojito, recipe below). Enjoy! I made the labels from a free website  http://blog.worldlabel.com/.  They are so cute.


cumquat


Ingredients

  • 2 cups of cumquat juice
  • 2 cups of white sugar
  • 2 cups boiling water
  • 1 teaspoon tartaric acid
  • 1 teaspoon citric acid

Preparation

  • Add the juice and sugar to a microwave jug and stir until all the sugar is dissolved.
  • Add the water, citric acid, tartaric acid  and microwave on high for 5 minutes. Pour into hot sterilised bottles and seal.
  • Keep in the fridge until you are ready to use.


cordial bottles


Cumquat Joquito

Ingredients

  • 2 sprigs of fresh mint
  • crushed ice
  • cumquat cordial
  • soda water

Preparation

  • Chop up mint and add it to a large glass and then mash it with the end of a rolling pin or muddler to bruise it
  • Add 1/4 cumquat cordial and 1/4 crushed ice
  • Top up glass with soda water and stir
  • Garnish with lemon or lime slices.

Cheers!

joquito

Microwave Pavlova Roll

I have a confession to make. This is the second pavlova roll I have made in two days. Yesterday’s pavlova was cooked the traditional way in the oven and was very nice. I served it up to my guests last night and didn’t end up getting a slice for myself. I stumbled across a microwave recipe today and with some small tweaks gave it a go. It is quick and easy and requires only a handful of ingredients and tastes divine. Today I used banana and passion fruit but you can use any fruit of your choice. I gave this pavlova an upgrade by adding crushed honeycomb that I keep in the cupboard for baking days (OK.. I sneak little bits sometimes when I get a sugar itch). To serve I used extra passion fruit syrup and crushed honeycomb on the plate. You won’t find an easier and more delicious recipe than this one… give it a go!

pav 7

 Ingredients

  • 4 egg whites
  • 4 tablespoons caster sugar
  • 1/2 cup desiccated coconut, browned
  • 1/2 cup whipped cream
  • 1 cup fruit of your choice

Preparation

  • Beat egg whites and the caster sugar till stiff peaks form.

pav 1pav 2

  • Spread onto baking paper placed over the microwave glass base to form a round.
  • Cook on high for 3 minutes.

pav 3

  • Let cool.
  • On another piece of baking paper spread out the browned coconut roughly the same size as the cooked pavlova.

pav 4

  • Place cooked pavlova over the top of the coconut.
  • Spread with whipped cream and place fruit on top.

pav 5

  • Using the baking paper, roll carefully to form a log.

pav 6

Asian Baked Salmon

Salmon was on special for $18 a kilo today. Bargain? It looked lovely and fresh as well. This salmon dish is so easy and packed with flavour. You can easily decrease the ingredients and make it a single serve or a meal for two. try this recipe… you won’t be disappointed. I adapted this from a recipe I found on the Epicurious website. It is always a good source of inspiration. Their recipe used skinless fillets. I prefer to use skin on as I think it protects the fish and keeps it very moist.

salmon

Ingredients

  •  3 cups of cooked rice
  • 4 teaspoons unsalted butter
  • 2 large cloves garlic, finely chopped
  • 1/2 teaspoon chilli flakes
  • 1/3 cup maple syrup
  • 1/3 cup fresh lime juice
  • 1/3 cup soy sauce
  • 2 teaspoons cornflour
  • 4 salmon fillets (skin on)
  • 1 tablespoon sesame oil
  • 1 bunch baby bok choy
  • 1 finely sliced spring onion
  • ½ carrot shredded

Preparation

  • Heat oven to 200°C.
  • Melt the butter in a small saucepan over a medium heat.
  • Add the garlic and chilli flakes and cook until the garlic is lightly golden.
  • Add syrup, juice and soy sauce and cook until bubbling, about 3 minutes.
  • In a bowl, combine the cornflour and water and add to the garlic glaze. Cook until slightly thick.
  • Arrange the fish on a foil-lined baking sheet that has been sprayed with cooking oil , skin side down.
  • Spread 2 teaspoons of the glaze over each fillet.
  • Roast until just cooked through, about 12 minutes.
  • In a medium fry pan, warm the oil over a medium heat. Add the bok choy and sauté until just wilted.
  • Divide the rice between 4 plates.
  • Place bok choy on top of the rice and then a salmon fillet.
  • Drizzle the remaining glaze over the fish.
  • Garnish with shredded carrot and spring onions.

Creamy Curried Baked Chicken

This is an easy recipe two step recipe that is full of flavour. It’s an interesting combination of ingredients. I have also made it using chicken tenderloins which I pan fried instead of baking. Just as delicious. Try serving with steamed rice or vegetables. I am sure you will make this recipe over and over.  Next time I make this recipe I am going to brine the chicken fillets first.


creamy chick

Serves 6

Ingredients 

  • 3 tablespoons light brown sugar
  • 1 teaspoon smoked paprika
  • 1 tablespoon curry powder
  • 1 tablespoon dried onions
  • 1 teaspoon cumin
  • 1 teaspoon  salt
  • 1/2 teaspoon black pepper
  • 1 teaspoon turmeric
  • 1 tablespoon finely chopped garlic
  • 2 tablespoons olive or coconut oil
  • 6 chicken breasts
  • 1 tablespoon butter
  • 300mls light cooking cream
  • 200 grams finely sliced mushrooms
  • 1/4 cup chopped parsley

Preparation

  • Preheat oven to 200°C.
  •  Place oil, sugar, paprika, cumin, salt, pepper, onion flakes, curry powder, turmeric and garlic in a bowl and stir to combine.
  •  Coat each chicken breast with the mix and cover and place in the fridge for  30 minutes or leave overnight. If you are pressed or time you can use immediately.
  •  Place chicken in a baking dish.
  •  Place in the oven and bake for 20-22 minutes until cooked through.
  • Remove the chicken from the baking dish and place on a plate.
  • Heat the butter in a large fry pan over a medium heat.
  • Add the mushrooms and cook for 3 minutes or the mushrooms have softened.
  • Add the cream and heat through.
  • Stir in the parsley and season with salt and pepper to taste.
  • Add the chicken and any juices on the plate to the fry pan and stir through.
  • Serve with steamed rice or vegetables.

creamy chick veg

Dulce de Leche – Electric Pressure Cooker Method

The method most of us know is to heat the can for hours and hours on the stovetop. Who has time for that? Plus worrying if the saucepan boils dry (I do know people who have done this and had to scrape hot goop off the ceiling). This recipe has a short cooking time and a long cooling down time as in other recipes. Best made overnight really. Dulce de leche  means  candy of milk or milk jelly in Spanish. It is a rich sauce or syrup, similar in flavor to caramel. Unlike caramel, however, which is made by heating sugar, dulce de leche is prepared by heating sweetened condensed milk. When the condensed  milk is cooked, the underlying process that transforms it into dulce de leche is the Maillard reaction which is similar but not the same as caramelisation. Making your own is easy and it tastes so much better than the tins of caramel you get in the supermarket. You can prepare tins in advance and store them in your pantry until you need to use it.  When you open the tin and are not going to use it all immediately (not sure if this ever happens LOL), place in a container and tightly cover and refrigerate.  Dulce de leche will keep for a month this way. Please take note of the safety tips at the bottom of this post. Once you have prepared Dulce De leche , there are many ways to use it including:

  • Banoffee Pie… who doesn’t enjoy this classic dessert
  • Use a liquid dulce de leche as a dessert spread
  • As a cake filling or as a filling between two biscuits
  • As a spread on toast
  • Warmed and poured over pancakes
  • Warmed and served as an ice cream topping
  • Fill pastries or tarts
  • Make Ice Cream
  • Straight out of the can..( naughty but nice)

Image           Image

Preparation

  • Prepare the pressure cooker by adding the trivet and steamer basket. Place the can on the steamer basket, being careful that it does not touch the sides or base of the pressure cooker. Do not skip this step. The can cannot be in direct contact with the base or sides of the pressure cooker.
  • Fill the pressure cooker with enough water to cover the can. Put the can on its side to make sure it is fully submerged while not exceeding the “maximum capacity” of the pressure cooker.
  • Close and lock the lid of the pressure cooker. Select the high setting and 15 minutes of  cooking time. it will take a while for the cooker to build up steam.
  • When the time is up, unplug the cooker and allow it to cool down naturally (overnight preferably). You must not allow the automatic keep warm mode to kick in. Do not remove the can from the cooker or attempt to open it while it is warm.
  • The next day, when completely cool, the can can be stored as it is or opened to use.
  • If the dulce de leche is too stiff, reheat on a medium setting on the microwave for 1 minute, check and stir and reheat in small bursts if a softer sauce is required.

CAUTION:

A few safety considerations when pressure cooking a can:

  •  Ensure the can is not damaged or nicked in any way
  • Remove the label, unless it’s printed on the can
  • DO NOT remove the can from the pressure cooker while the water in which it is submerged is still warm (the contents of the can are still under pressure)
  • DO NOT jostle or shake the pressure cooker containing a heated can.
  • DO NOT open the can while it is still warm (the contents may still be under pressure) – let it cool overnight before opening.

Serving Suggestion – Banoffee Pie


Image